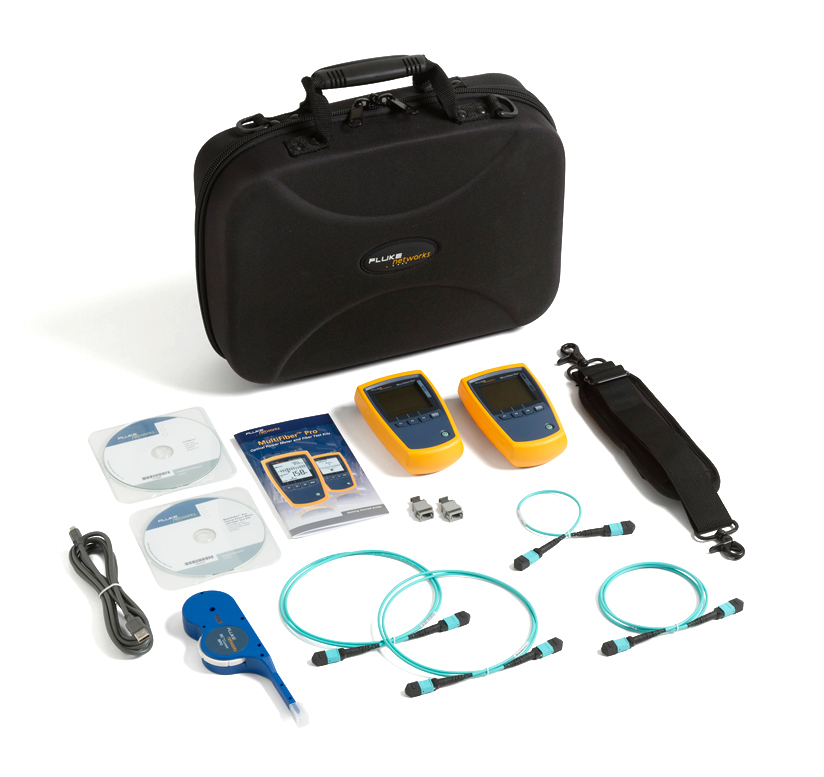
Certifying pinned MPO multimode links with the MultiFiber Pro (Method 2)
This article describes Method 2 for certifying multimode links with 12, 10 or 8 fiber pinned MPO connectors at each end, using the MultiFiber Pro. For Method 1, click here. You could try and certify the link using a duplex tester such as the CertiFiber Pro, details on how can be found here. But as you will see, the setup process is very involved and the polarity check relies on the technician understanding the three types of polarity; Type A, B and C. With the MultiFiber Pro, polarity is reported automatically.

The MultiFiber Pro is agnostic when it comes to test leads. You can use Type B cords to test Type A links and vice versa. The same is true for Type C links. Additionally, if your trunk cable only has 8 fibers to support 40GBASE-SR4 or 10 fibers to support 100GBASE-SR10, MultiFiber Pro will automatically recognize it as a valid link and will not fail the link if the correct fibers are absent, shown below:
You will need:
- MFTK1200
- Gender changing MPO 1 m test cords Quantity 2 (Inserting unpinned cords into the source or meter will result in unstable readings)
- MPO bulkhead adapter
Additionally, inspection is critical for this method to work. Without inspection, you will end up with pessimistic and unpredictable results. MPO adapter tips are available for the USB FI-1000 FiberInspector which attaches to the Versiv platform.
Test limits
You will be required to calculate the expected loss of the link you are testing and enter this into the MultiFiber Pro. We cannot and will not advise as to what is a suitable test limit. You must consult with the designer of the cabling system. Information on application test limits can be found in the Versiv test limit document.
Entering a test limit
-
Select the desired wavelength by pressing the F3 key.

-
Press and hold down the MENU/SELECT key for approximately 3 seconds to see:
-
Press the F1 key to move the cursor to LOSS LIMIT:

-
Press the MENU/SELECT key to select it:
- Use the F1 and F2 keys to change the dB value to match your requirement.
- Press the MENU/SELECT key when done to save it.
- Press the MENU/SELECT key again for approximately 3 seconds to exit the setup menu.
Making the measurement
- Turn on the source and meter allowing them to stabilize for at least 5 minutes. If the instruments have been stored at the same temperature as your test area, 5 minutes is usually long enough. If there is a significant temperature change from where they were stored to where you are using them, you will need to allow them extra time to stabilize. We shall check the sources for stability in step 6).
-
Connect the meter and the source together using your first pinned to pinned gender changing MPO test cord:

- No more than one oval should be missing from the power meter screen. Ideally, you should see five ovals for all twelve channels. If you see three ovals or less for any channel, your test cord may need replacing. The ports on the MultiFiber Pro may need cleaning too. If you carry on with more than one oval missing here, your test results will be unpredictable.
-
Press MENU/SELECT so that you see SET REF on the screen: (The referencing will begin automatically)

-
When complete, SAVE will appear above the F1 key. Press F1 and the screen should report 0.00 dB:
- Check source stability by leaving the test cord attached for 30 seconds. If you see a change in loss, repeat step 4 again until you get a stable reading.
-
Disconnect from the meter side: (DO NOT DISCONNECT FROM THE SOURCE)

-
Using the gender changing tool, change the connector on Test Cord #1 to unpinned: (DO NOT CHANGE THE TEST CORD)

-
At the meter, insert your second pinned to pinned gender changing MPO test cord:
-
Connect the source and meter together. Ensure the reported loss is no worse than 0.35 dB across all channels:

-
Disconnect the meter and source:
-
Using the gender changing tool, change the connector on Test Cord #2 to unpinned: (DO NOT CHANGE THE TEST CORD)
-
Connect to the link you wish to certify. In six seconds, the optical loss across all twelve fibers will have been measured.

- Press F1 to save your result. (All 12 fibers will be saved at the same time)
Additional information
- When viewing LOSS, each oval represents 25% of your entered test limit.
- A loss reading less than -0.09 dB will result in a fail. If this should happen, your sources were not allowed to stabilize. Reset the reference again.
- MPO test cords should be inspected and replaced often. Vendors specify a typical mating life of between 500 and 1000 insertions for multimode MPO/MTPs.
- The MultiFiber Pro will store 3,000 fiber loss results (250 MPO links, each with 12 fibers)
- Results can be imported into LinkWare PC via the supplied Micro USB cable.
Creating a test report
Using the latest version of LinkWare PC Software, connect the meter to the PC using a standard Micro USB cord (supplied). Click on the red arrow in the tool bar, selecting MultiFiber Pro. Follow the import wizard instructions.


